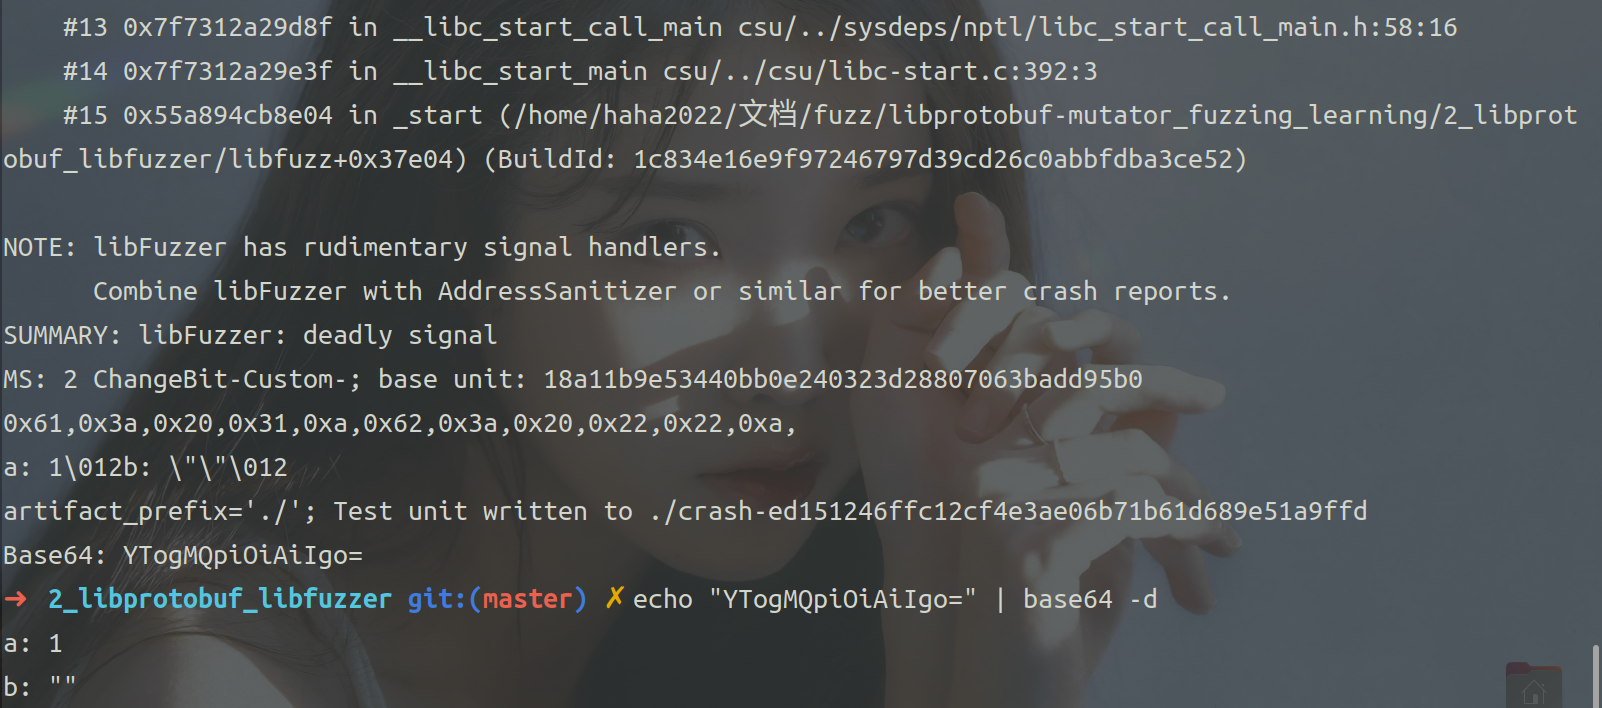
std::string res = all.str(); if (bb.size() != 0 && res.size() != 0) { // set PROTO_FUZZER_DUMP_PATH env to dump the serialized protobuf if (constchar *dump_path = getenv("PROTO_FUZZER_DUMP_PATH")) { std::ofstream of(dump_path); of.write(res.data(), res.size()); } } return res; }
extern"C"intFuzzTEST(constuint8_t* data, size_t size); // our customized fuzzing function
DEFINE_PROTO_FUZZER(const TEST &test_proto) { auto s = ProtoToData(test_proto); // convert protobuf to raw data FuzzTEST((constuint8_t*)s.data(), s.size()); // fuzz the function }
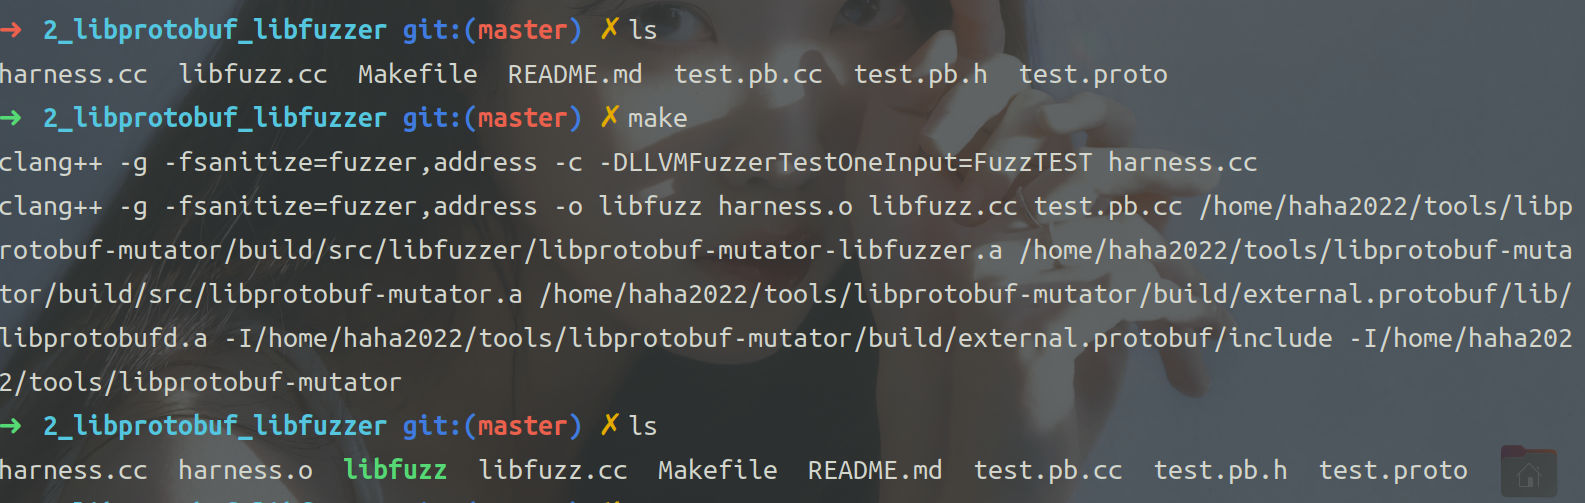
# for testing libprotobuf + libfuzzer # compile harness first # then link lpm_libfuzz with harness.o & static libraries harness.o: harness.cc $(CXX)$(CXXFLAGS) -c $(DFUZZ)$<
// 自定义突变规则 extern"C"size_tafl_custom_fuzz(void *data, // afl state uint8_t *buf, size_t buf_size, // input data to be mutated uint8_t **out_buf, // output buffer uint8_t *add_buf, size_t add_buf_size, // add_buf can be NULL size_t max_size){
// Here we implement our own custom mutator static MyMutator mutator; TEST input; // mutate input.a ( integer ) int id = rand() % 305; input.set_a(id); // mutate input.b ( string ) 自定义为commands内容 std::string tmp = commands[rand() % 3]; input.set_b(tmp); // convert input from TEST to raw data, and copy to mutated_out const TEST *p = &input; std::string s = ProtoToData(*p); // convert TEST to raw data // Copy the raw data to output buffer size_t mutated_size = s.size() <= max_size ? s.size() : max_size; // check if raw data's size is larger than max_size uint8_t *mutated_out = newuint8_t[mutated_size+1]; memcpy(mutated_out, s.c_str(), mutated_size); *out_buf = mutated_out;
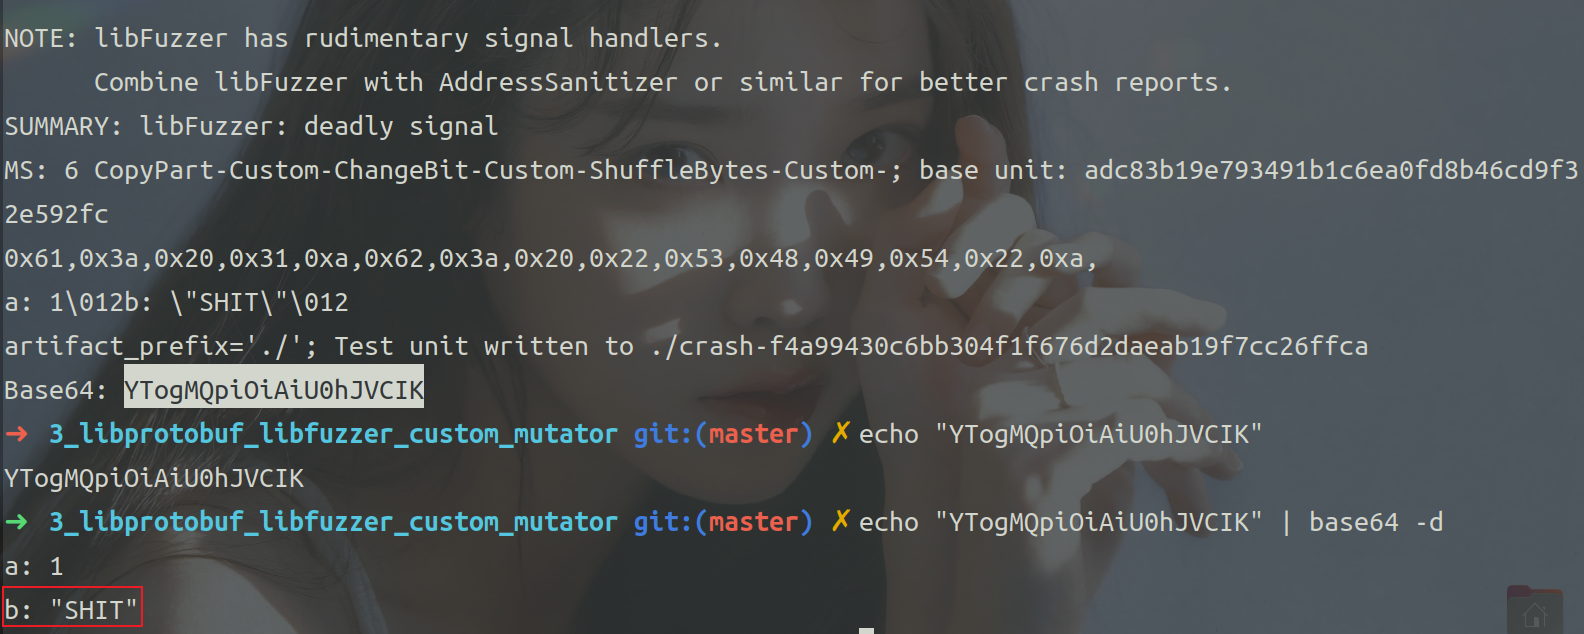
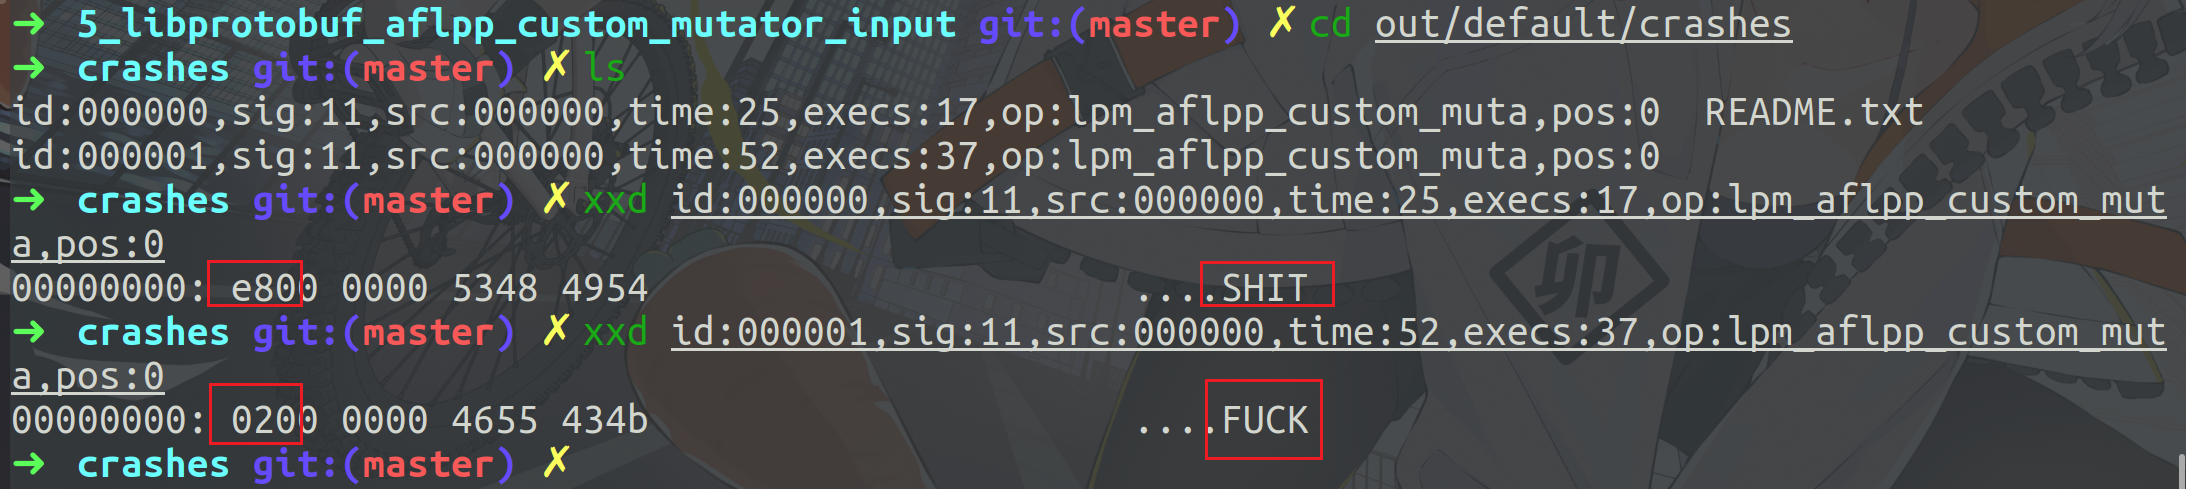
bool hasRegister = false; if(!hasRegister) { protobuf_mutator::libfuzzer::RegisterPostProcessor( TEST::descriptor(), [](google::protobuf::Message* message, unsignedint seed) { TEST *t = static_cast<TEST *>(message); /* test.b will only be "FUCK" or "SHIT" */ t->set_a(rand() % 256); if (seed % 2) { t->set_b("FUCK"); } else { t->set_b("SHIT"); } } ); hasRegister = true; return; }
srand(seed); return mutator; }
extern"C"size_tafl_custom_fuzz(MyMutator *mutator, // return value from afl_custom_init uint8_t *buf, size_t buf_size, // input data to be mutated uint8_t **out_buf, // output buffer uint8_t *add_buf, size_t add_buf_size, // add_buf can be NULL size_t max_size){
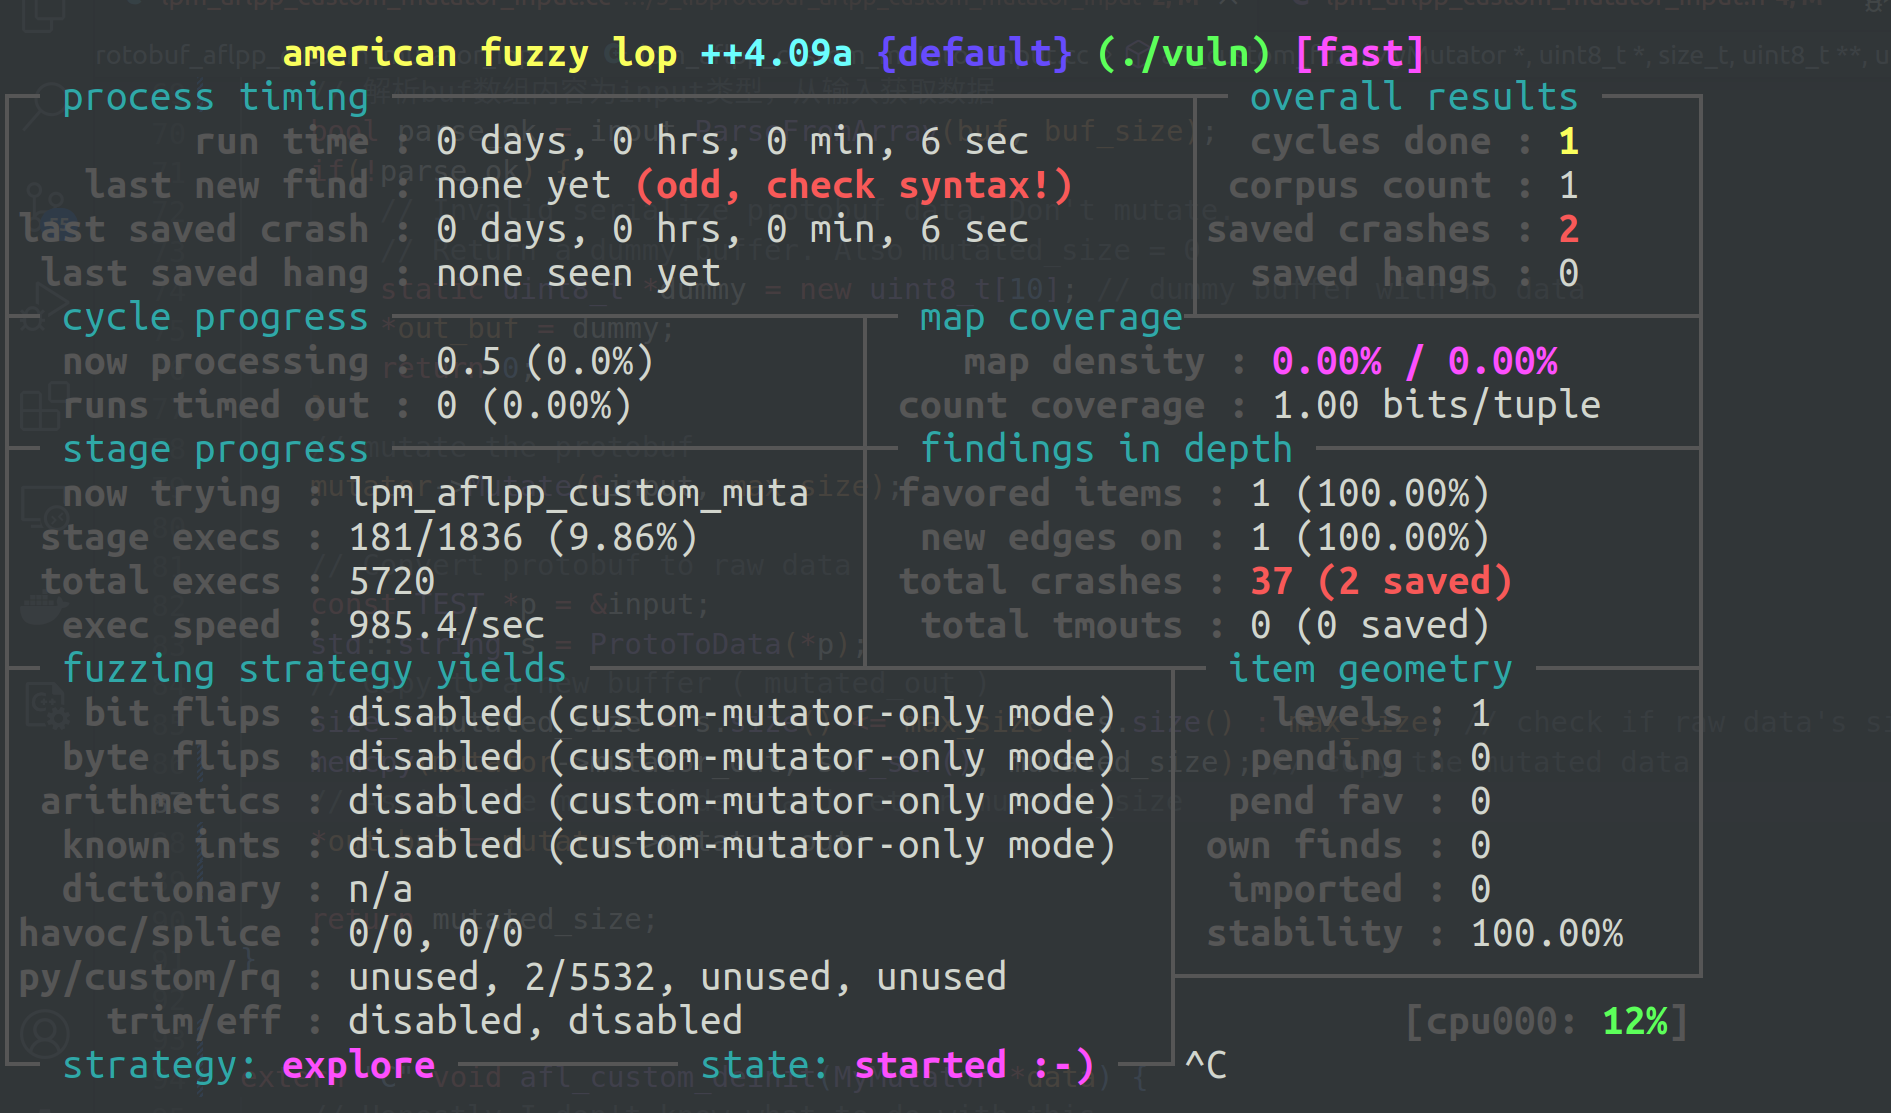
TEST input; // 解析buf数组内容为input类型,从输入获取数据 bool parse_ok = input.ParseFromArray(buf, buf_size); if(!parse_ok) { // Invalid serialize protobuf data. Don't mutate. // Return a dummy buffer. Also mutated_size = 0 staticuint8_t *dummy = newuint8_t[10]; // dummy buffer with no data *out_buf = dummy; return0; } // mutate the protobuf mutator->Mutate(&input, max_size);
// Convert protobuf to raw data const TEST *p = &input; std::string s = ProtoToData(*p); // Copy to a new buffer ( mutated_out ) size_t mutated_size = s.size() <= max_size ? s.size() : max_size; // check if raw data's size is larger than max_size memcpy(mutator->mutator_out, s.c_str(), mutated_size); // copy the mutated data // Assign the mutated data and return mutated_size *out_buf = mutator->mutator_out;
return mutated_size; }
extern"C"voidafl_custom_deinit(MyMutator *data){ // Honestly I don't know what to do with this...